Startup Shortcuts: Create Free Videos About Your Product, Part Two
In this series, I share some of the free/low-cost solutions that I’ve discovered for common startup challenges. Read previous posts here, here, here, and here.
In my previous post, Startup Shortcuts: Create Free Videos About Your Product, we reviewed the first half of the process. Today, we’re tackling steps 3 and 4.
- Step 1: Write your script
- Step 2: Create your visuals
- Step 3: Record your audio
- Step 4: Edit it all together
As a reminder, here’s what you’ll need:
Software that is probably already on your computer:
- PowerPoint
- Windows Movie Maker
- Windows Sound Recorder (and you may want an external microphone)
Software you may need to download:
- A screencasting tool – check out Richard Byrne’s recommendations
Step 3: Record your audio
 Since you’ve already written your script, you might think that recording your audio should be a breeze. However, it never is for me. For some reason, I always need to do multiple takes, before I can get through the entire script without messing up.
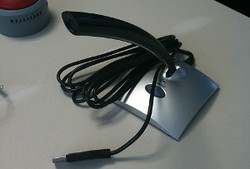
I only know how to do very basic editing, so I’ve learned that it’s always worth the time to keep doing takes until the audio is right all the way through, rather than trying to splice together a bunch of audio clips later on. I use a basic Logitech desktop microphone and Windows Sound Recorder. Not fancy, but it does the job.
Step 4: Edit it all together
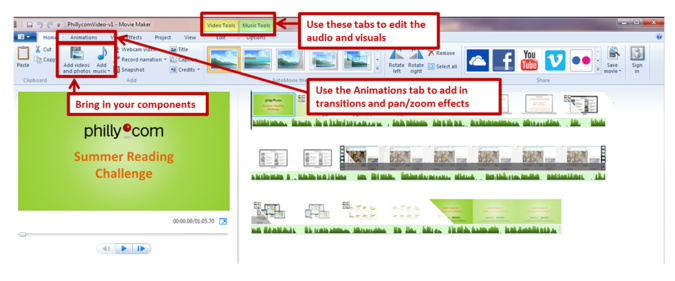
Now, finally, you have all the components: an audio file of your script and all of your visuals, including images and screencast videos. I use Windows Movie Maker to edit them together.
This is the process that I use:
- Bring in all your components
- Edit the audio: I trim the audio to get rid of any dead space at the beginning and end.
- Edit the visuals: Then I listen to the audio as I edit the timing for all the visuals, i.e., should this image show for 10 seconds or 15 seconds? I do this until the images and screencasts being shown in the video match up with the audio that I’ve recorded.
- Smooth out the transitions: I use a basic fade in/out to transition from image to image. This softens the transitions so it doesn’t feel like you’re going through slides in a presentation.
- Use pan/zoom effects to create movement in static images: This is also known as the Ken Burns effect. Windows Movie Maker gives you the ability to zoom in/out and pan across the screen. This also helps make the video feel less like a PowerPoint presentation.
When you’re done, just save it, export it, and upload it! Here’s an example video that I created using this method.

Once again, it’s nothing fancy, but the video is functional and it’s very easy to customize it for your desired audience. I have definitely found that being able to quickly create demo/intro videos, on my own, for free, has been an extremely effective way to promote ProfessorWord. I hope this helps you too!
Until next time,
See also:
- Startup Shortcuts: Create Free Videos About Your Product
- Startup Shortcuts: How to Find Low-Cost Legal Services
- Startup Shortcuts: Need Stock Photos, but Have No Money?
- Startup Shortcuts: PowerPoint as a Free Graphics Editor
- Exhibiting Your Startup at an Expo: The Ultimate Packing List
Have questions or feedback? Comment below or let me know on Twitter @professorword!
Photo Credit: Flickr user Joel Bez


KineMaster video editor another great video editor for android
You can watch the best quality videos for free today with the live net tv app
With live net tv app, photo editing will be much better at https://techbigs.com/live-net-tv-apk.html
Take the telecharger iptv marters pro android gratuit to watch movies and TV channels in the best quality.
Please telecharger iptv marters pro android gratuit https: //androidrub.com/iptv-smarters-pro to watch movies and TV channels in the best quality.